Quick Start (5 minutes)
This guided exercise moves a set of Desktop screenshots into an Archive folder, showing how the dual-pane model, search, selection, and the queue fit together.
Before you begin
- Make sure you have a few files on your Desktop whose names contain “Screenshot”. To create some quickly on macOS: press ⇧⌘3 for the whole screen, ⇧⌘4 to capture a selection, or ⇧⌘5 to open the screenshot toolbar (save location is Desktop by default).
- Create a destination folder (we’ll auto-create it in the steps if it doesn’t exist).
Keyboard legend: ⌘ Command · ⌥ Option · ⌃ Control · ⇧ Shift · ⏎ Return · Space
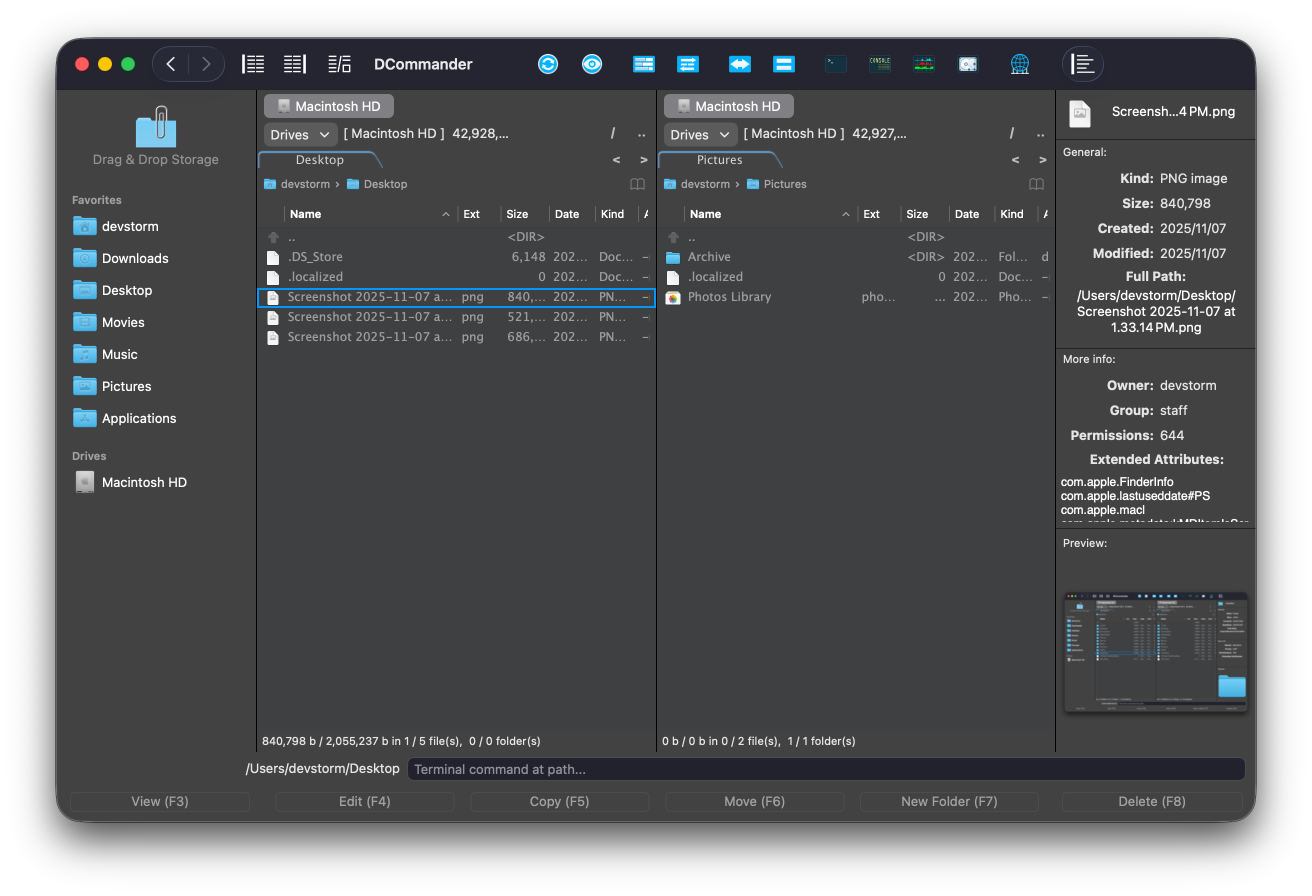
Step 1 — Open the source and destination
- In the left pane, navigate to your home folder
~. - In the right pane, navigate to
~/Pictures/Archive.- If it doesn’t exist, press F7 (New Folder), type
Archive, and press ⏎.
- If it doesn’t exist, press F7 (New Folder), type
tip
Keyboard-only: Use ⇥ to switch panes; ↑/↓ to move, ⏎ to open, ⌫ (or ← with Lynx-like nav) to go up.
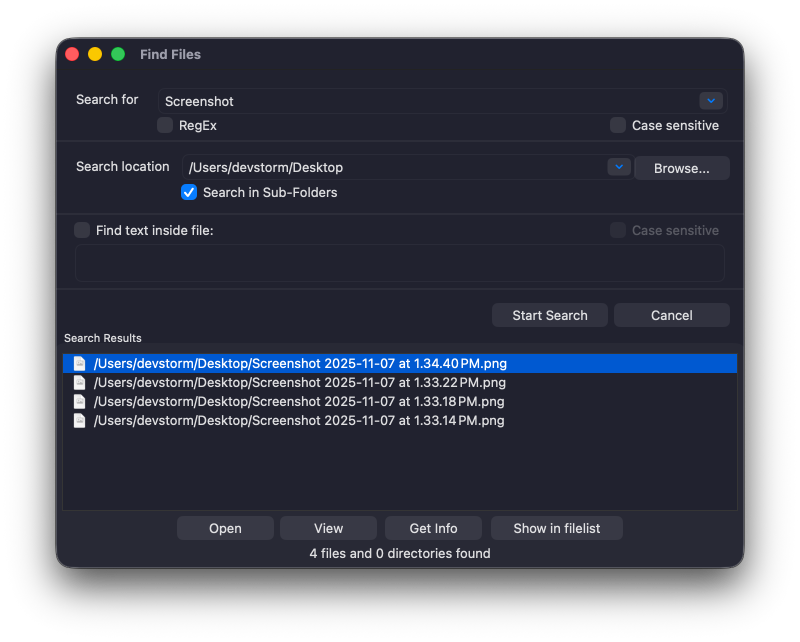
Step 2 — Find the files quickly
- Press ⌥F7 to open Find Files.
- In the Search for field, type:
Screenshot - In the Search location: Current folder (recurse via
Search in Sub-Foldersif your screenshots are nested). - Start the search, then focus on the search results.
- Select a file then click on
Show in filelist - The left pane will navigate to
~/Desktop, where the screenshot files are
Step 3 — Select what you want to copy
- Sort by Date (click the
Datecolumn header twice) to get newest first. - Select the latest items using any of these methods:
- Range: click the first, ⇧-click the last (or ⇧ + ↑/↓).
- Pick list: ⌘-click to add/remove items.
- Toggle: highlight an item and press Space.
tip
Mark menu → Select all with same extension or Expand/Shrink selection for pattern-based picks.
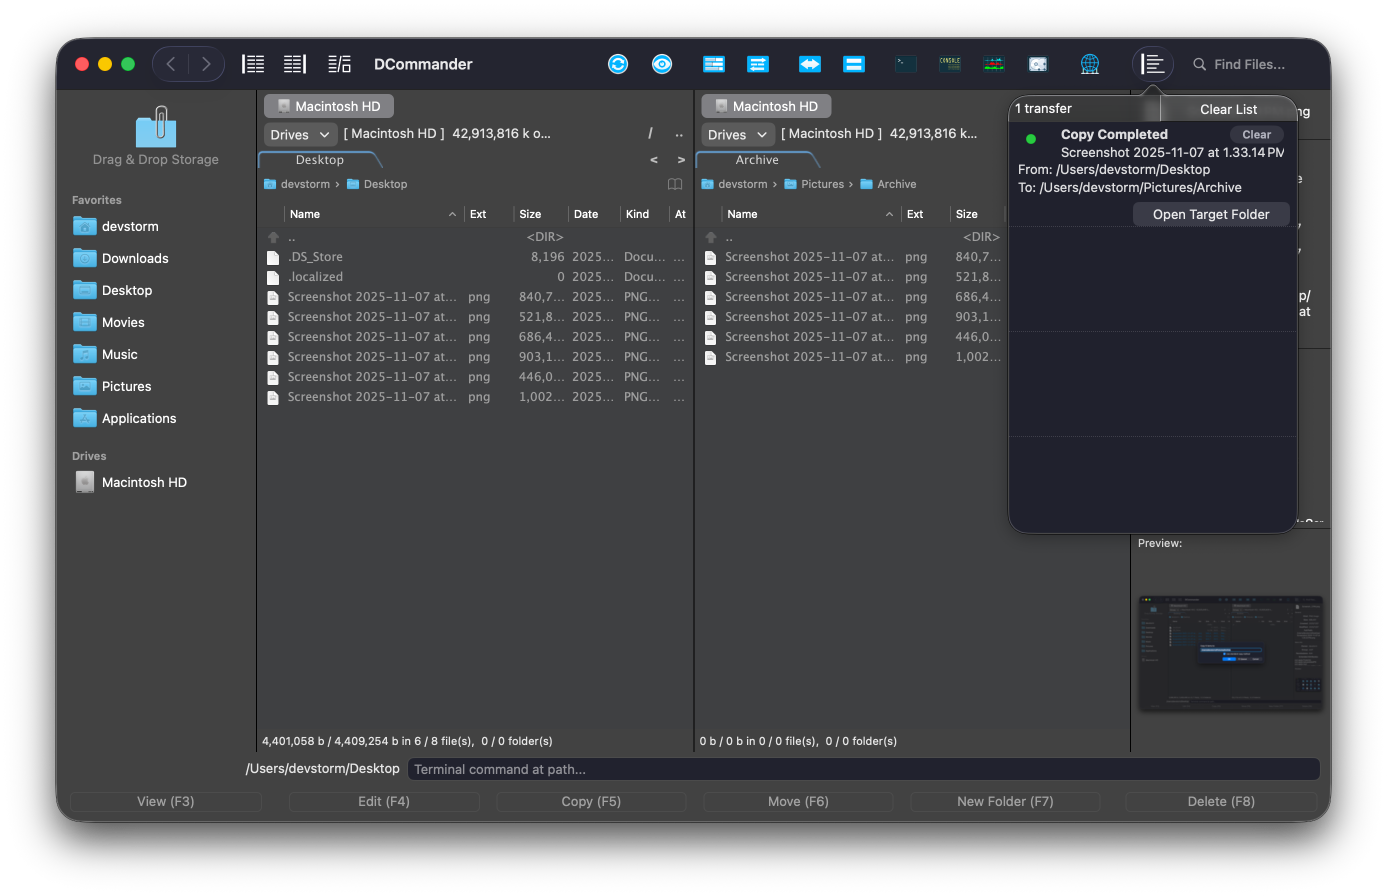
Step 4 — Copy left → right
- Ensure left pane is active (⇥ if needed).
- Press F5 (Copy). Review the confirmation dialog to verify the destination path (right pane).
- Confirm to start the transfer.
Direction rules: Copy/Move always flows from the active pane → to the inactive pane.

Step 5 — Watch and manage the transfers
- Open Transfer Manager with ⌘J.
- Observe the new entry.
- Click on Open Target Folder to quickly navigate to the target folder.
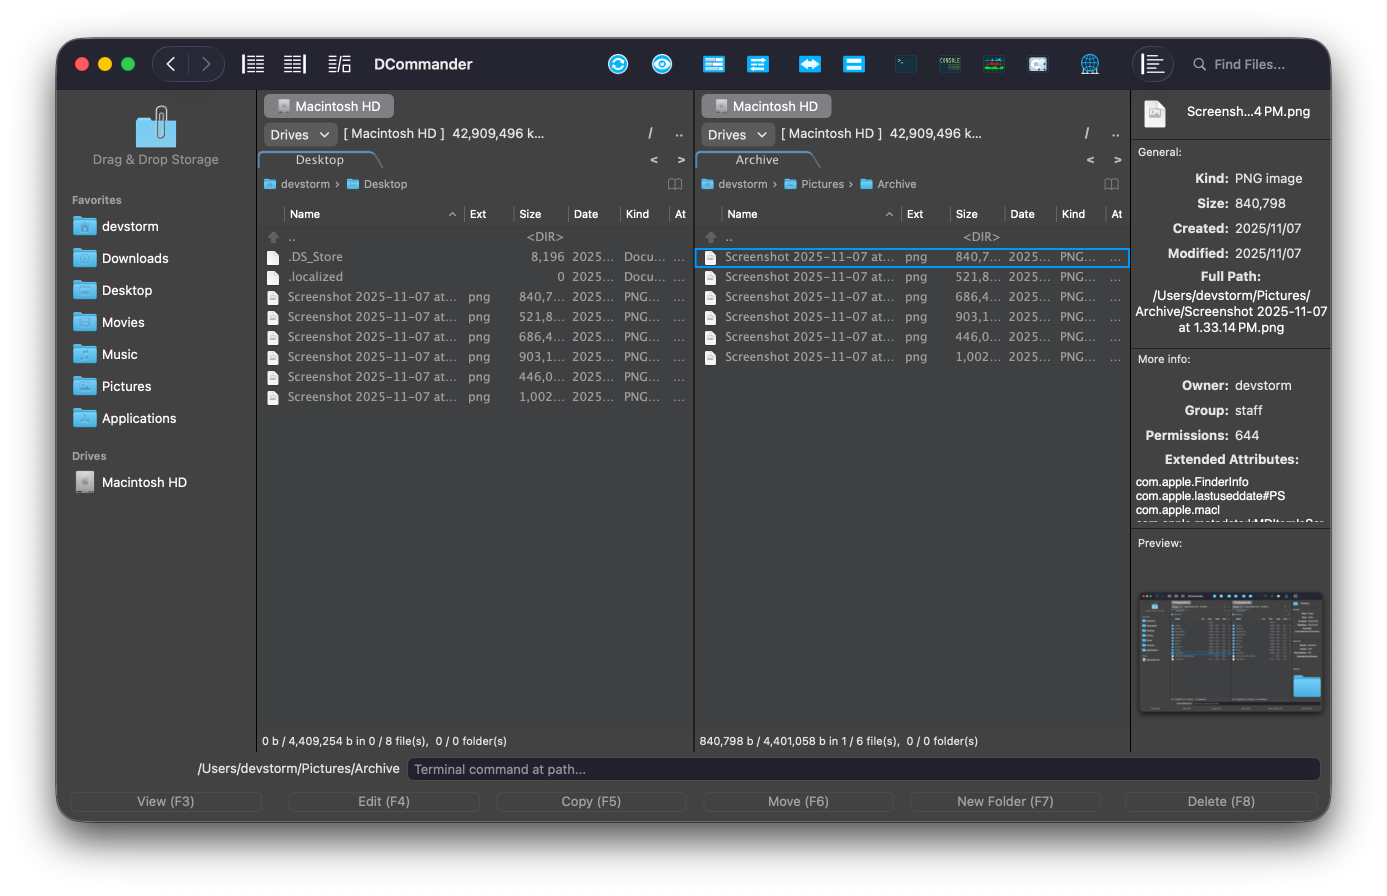
Step 6 — Verify the results
- In the right pane (
~/Pictures/Archive), press ⌥ + Space to Quick Look a few files. - Check the Info bar (below the list) for selected/total counts and size.
Step 7 — Try the variants
A) Move instead of copy
- Repeat the selection and press F6 (Move). Choose
Overwrite All. The transfer manager will remove sources after a successful transfer.
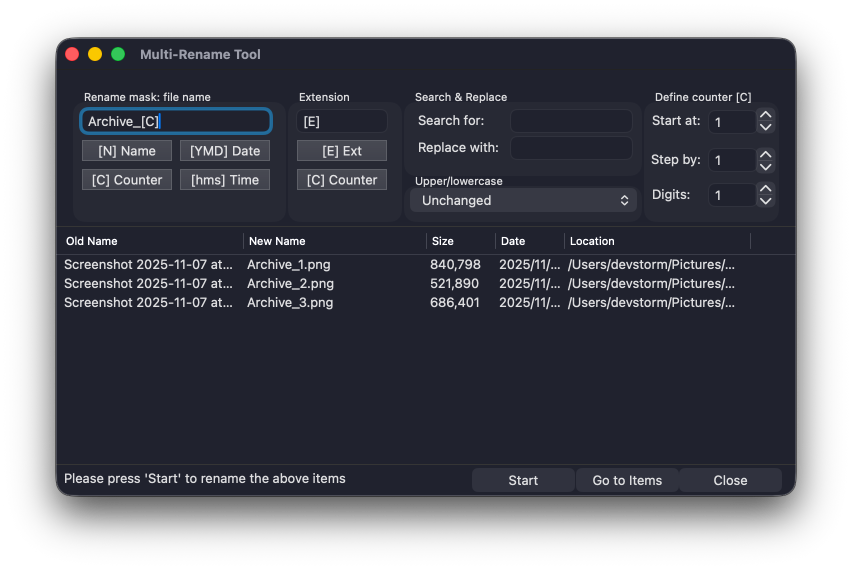
B) Batch rename the destination files
- In the right pane, select the new files → Commands menu → Multi Rename → add a sequence (e.g.,
Archive_[C]) → preview → Start.
Keyboard-only drill
- ⇥ to left pane →
~/Desktop. ⇥ to right pane →~/Pictures/Archive(create with F7 if needed). - ⇥ back to left pane → ⌥F7 (Find Files) →
*Screenshot*→ enter. - ⇧+↑/↓ to range-select newest → F5 copy → confirm.
- ⌘J check queue → ⇥ to right pane → Space Quick Look to validate.
Troubleshooting
- Nothing appears in Search: Make sure you searched the correct pane and folder (Scope). Try
Screenshot. - Permission errors: Grant necessary permissions. See First-run Setup.
- Slow copies to removable media: In Preferences › Operations, test the alternate byte-by-byte copy method for legacy drives.
Clean up (optional)
- To reset, delete the copied files from
~/Pictures/Archive(select → F8), or move them back with F6.
What you learned
- Pane focus and directionality (active → inactive)
- Fast discovery with Find Files and sorting
- Selection techniques (range, toggle, patterns)
- Safe, observable operations in the Transfer Manager
- Quick visual verification with Quick Look
- How to extend the workflow with Move and Batch Rename
Next steps
- Master the Keyboard Shortcuts.
- See File Operations and Compare & Sync.
- Connect a share in Remote Connections and repeat the exercise over SMB/SFTP.