When you need to mirror folder mac data to an external drive, you are looking…
How to Batch Rename to Lowercase on Mac Best for Web & Consistency
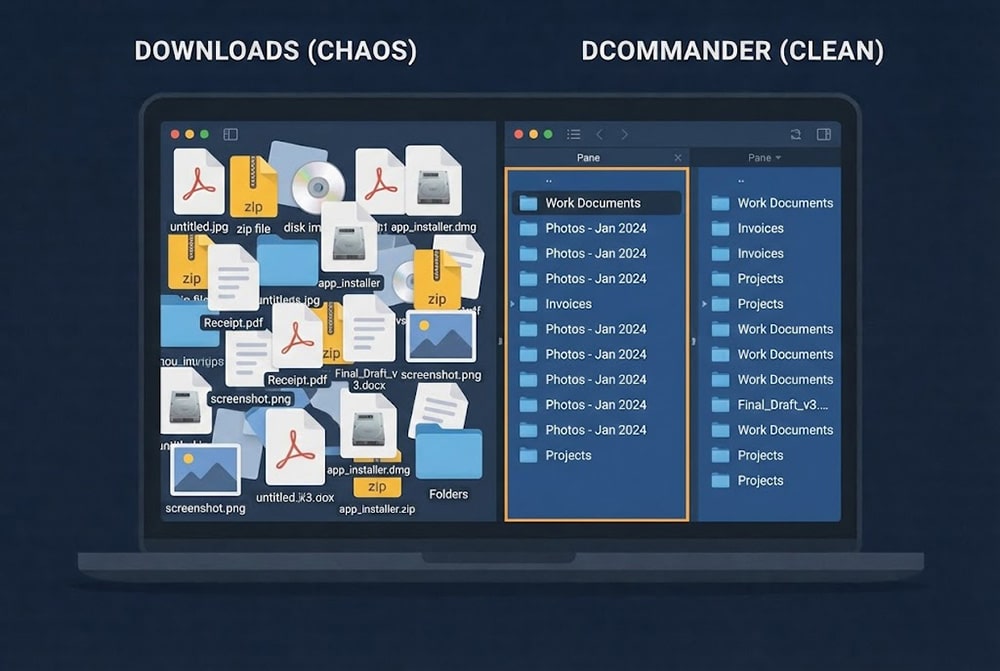
Consistency is very important in file management, and knowing how to batch rename to lowercase on Mac is an essential skill for developers, web designers, and organized professionals. While macOS (APFS) is generally case-insensitive, Linux servers and web hosting environments are not. A file named Image.JPG is completely different from image.jpg on a web server, leading to broken links and 404 errors. We’ll look at two ways to standardize your filenames to lowercase so you can ensure compatibility and cleanliness across all platforms.
Table of Contents
Why Case Sensitivity Matters
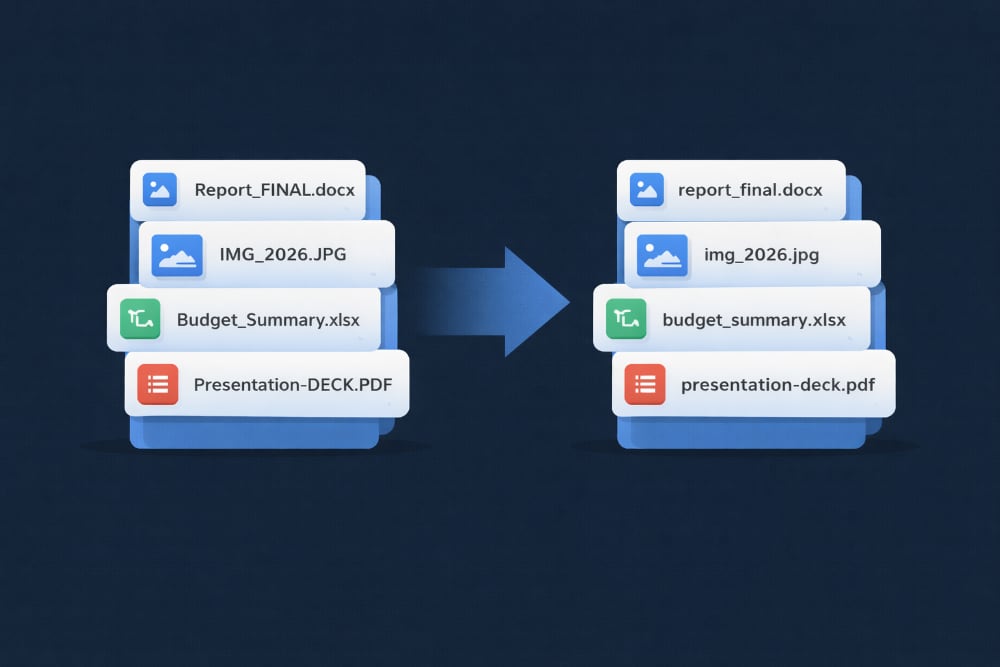
On your Mac, Report.pdf and report.pdf cannot coexist in the same folder because the file system treats them as the same name, unless formatted with specific parameters. However, when you upload files to the cloud, a Git repository, or a Linux server, case matters. Mixing “CamelCase”, “UPPERCASE”, and “lowercase” creates a messy directory listing and makes programmatic file access difficult. Converting everything to lowercase is the industry standard for safe file naming.
How to convert files to lowercase using Terminal?
You can perform a batch rename to lowercase on Mac using the Terminal. Since modern macOS uses the Zsh shell by default, you can use built-in modifiers to change text case without needing complex scripts.
Launch Terminal from the Applications folder, navigate to your target directory (cd path/to/folder), and type:
autoload -U zmv
zmv '(*)' '${1:l}'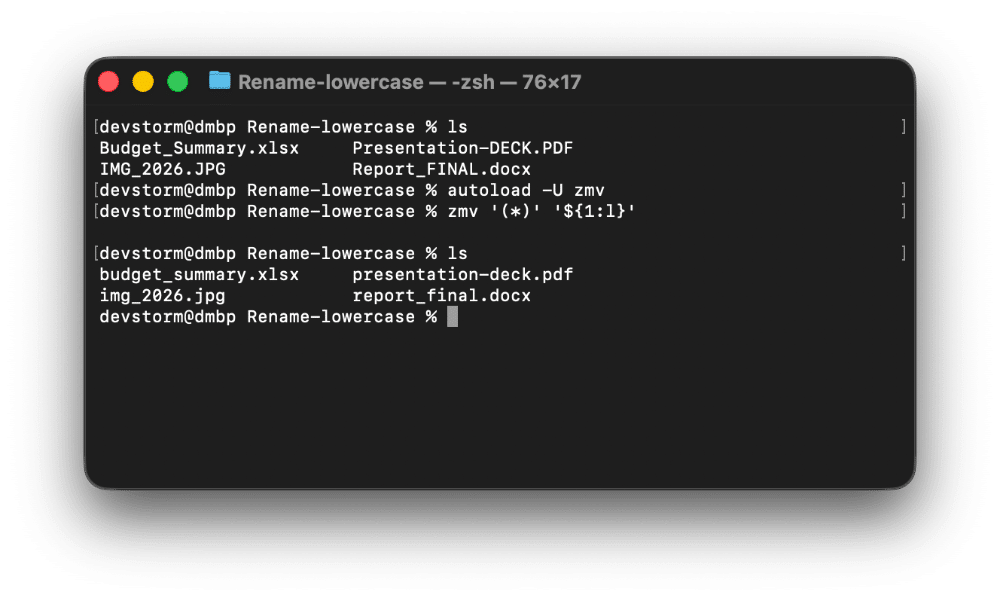
Breakdown of the command:
- autoload -U zmv: Loads the Zsh “move” function, which is designed for batch renaming.
- ‘(*)’: Matches all files in the current folder.
- ‘${1:l}’: Converts the matched filenames to (l)owercase.
Limitations:
While zmv is powerful, it is strictly text-based. If you have a file collision (e.g., trying to rename Test.txt to test.txt when a temp file already exists), the command might fail or throw an error. There is no undo button, and you cannot see the results until you hit Enter.
How to convert files to lowercase using DCommander?
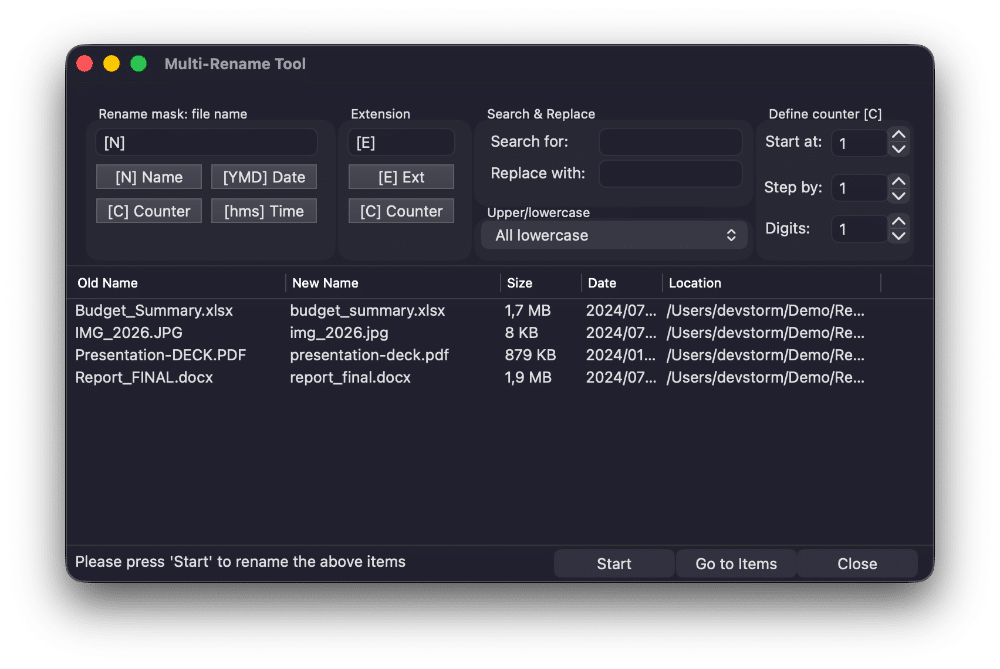
A much easier and safer way to batch rename to lowercase on Mac is to use DCommander. Its Multi Rename tool includes dedicated case transformation features that handle the complexities of case-insensitive file systems automatically, providing a live preview before you commit.
First, download and run DCommander.
- Select Your Files: In the file pane, select all the files you want to normalize (CMD+A).
- Open Multi Rename: Click the Rename multiple files at once icon in the toolbar.
- Set Case Rule: Locate the Upper/lowercase dropdown menu in the settings panel. Change it from “Unchanged” to All lowercase.
- Verify & Apply: Look at the Preview column. You will see IMG_2026.JPG transforming into img_2026.jpg. Click Start.
Why this is superior:
- Live Preview: You see exactly how the filenames will change before they are touched.
- Smart Handling: DCommander handles the operating system quirks where changing case on the same filename can sometimes be tricky.
- Combine Actions: You can convert to lowercase and replace spaces with underscores (e.g., My File.TXT → my_file.txt) in a single pass.
- Flexible Options: Besides lowercase, you can also choose UPPERCASE.
Tips for Clean Filenames
- Stick to Lowercase: For web assets (images, CSS, JS), always use lowercase. It prevents 99% of “file not found” errors during deployment.
- Avoid Spaces: Combine lowercase conversion with replacing spaces. Use hyphens (-) or underscores (_).
Conclusion
Whether you use the Zsh zmv command or the graphical interface of DCommander, performing a batch rename to lowercase on Mac is a critical step for file hygiene. For most users, DCommander offers the best balance of speed and safety, ensuring you don’t accidentally overwrite data while cleaning up your digital library.
Related Posts