DCommander Basics
Interface Overview
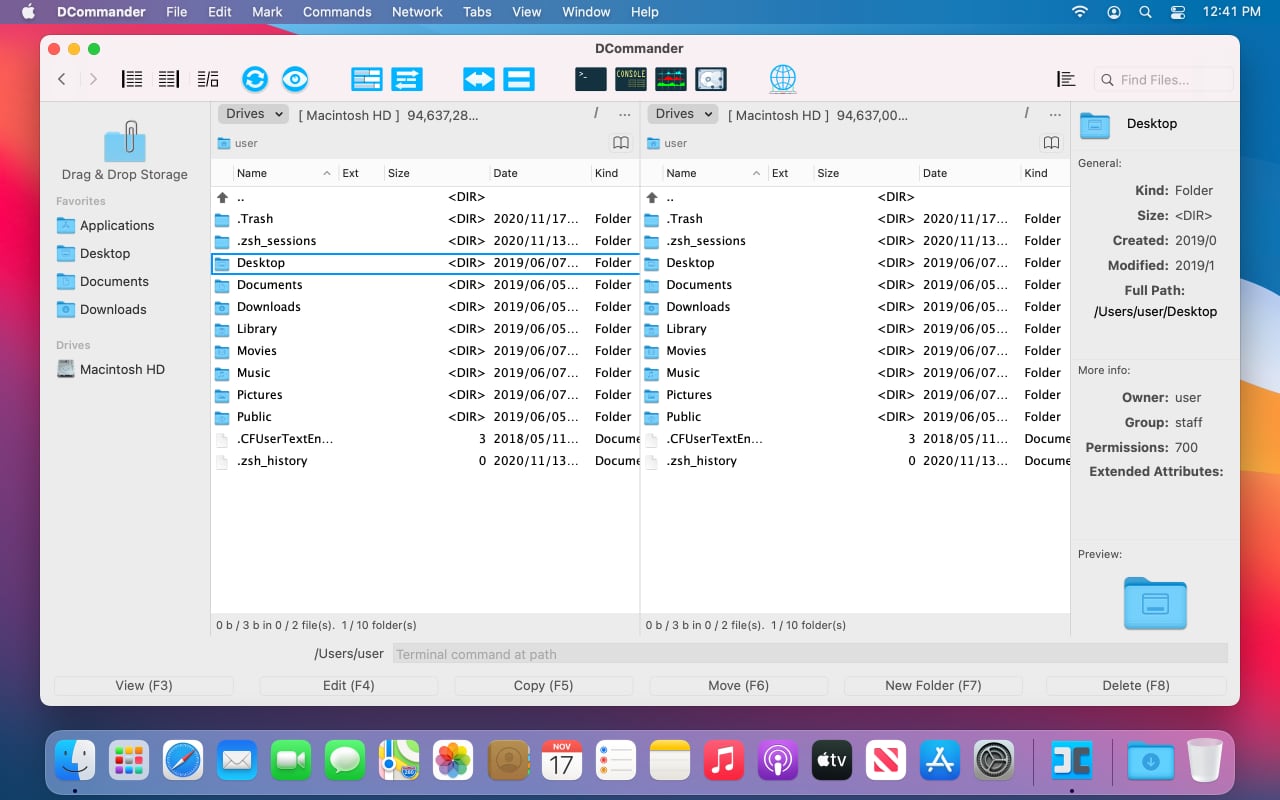
DCommander shows one main window containing all important elements.

Toolbar

The toolbar contains button shortcuts to frequently used commands. If you're not sure what a button does, hover your cursor over it to view the tooltip. You can also right-click on the toolbar to customize the appearance, such as showing icon labels, changing icon sizes or repositioning buttons.
- Back / Forward buttons will go through your navigation history. Long-pressing the Back or Forward toolbar buttons shows the complete navigation history list and allows you to jump to a specific step.
- Left Sidebar / Right Sidebar buttons will toggle visibility of the sidebars, allowing you to customize the main window layout.
- Toggle Right Sidebar Mode button will change the right sidebar's display mode between File Information and Favorite Shortcuts.
- Refresh File Lists button will reload the contents of both file lists. It is useful for making sure the contents displayed is up to date. Can also be triggered by pressing ⌘ Command + R on your keyboard.
- Show Quicklook button will show the QuickLook panel for the selected item(s). Pressing the button again will close the QuickLook panel. Can also be triggered by pressing ⌴ Spacebar on your keyboard.
- Rename multiple files at once button will show the Multi Rename tool for the selected item(s). You need to select at least one item for the rename tool to work correctly.
- Synchronize files and folders button will show the Synchronize tool. The source folder will be the left file list's current path, while the target folder will be the right file list's current path.
- Swap Left and Right file lists button will change the left file list's current path to the right file list's current path and the right file list's current path to the left file list's current path, then reload both file lists. Can also be triggered by pressing ⌘ Command + U on your keyboard.
- Navigate to the same path in both file lists button will change the inactive file list's path to the currently active file list's path, then reload. Can also be triggered by pressing ⌘ Command + E on your keyboard.
- Terminal / Console / Activity Monitor / Disk Utility buttons will show the respective system applications.
- Connect to network drives button will show the Connection Manager, from where you can connect to remote servers and mount network drives.
- Transfer Manager button will show the file transfer queue and history panel. It allows you to pause and resume transfers and open target folder for each entry. Can also be triggered by pressing ⌘ Command + J on your keyboard.
- Find Files... input box will show the Search tool after you press the ⏎ Return key. Can also be triggered by pressing ⌥ Option + F7 on your keyboard.
File Lists

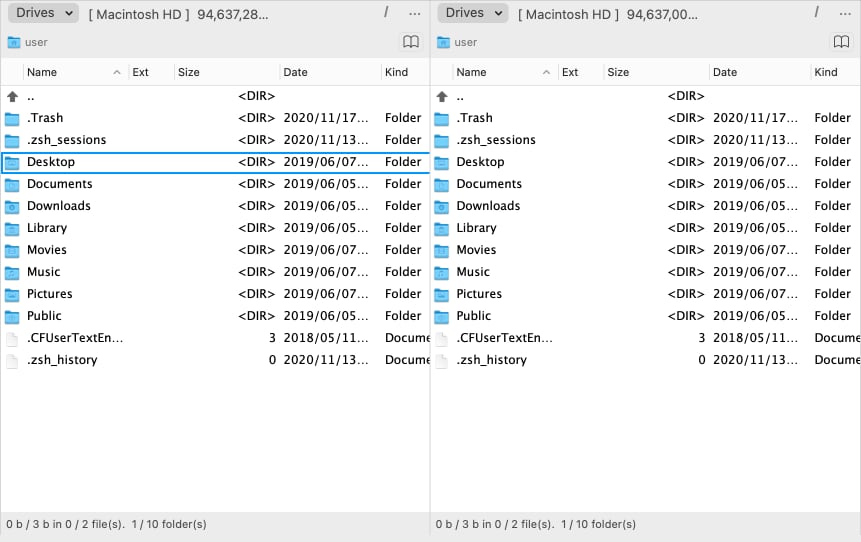
The File Lists are the most important parts of the interface and is where you visualize the contents of your drives.
At the top you'll find the Drive Bar. It starts with a dropdown button which allows you to select a different drive. Next to it you'll find an information label showing the current drive's name and disk usage. Next you'll find a / button which allows you to navigate to the root of the drive. Next you'll find a .. button which allows you to navigate to the parent folder. The drive bar can also be configured from the Preferences window to show all the available drives as a horizontal button list.
Below the drive bar you'll find the Tabs Bar if configured to be shown from the Preferences window. The tabs bar will show all current tabs and will allow you to switch between them.
Next you'll find the Current Directory Bar, which shows the current directory path as clickable breadcrumbs, allowing you to quickly navigate to parent folders. On the far right you'll find the Folder Hotlist button, which shows the list of Favorite locations. The list is the same as on the left sidebar's Favorites section. The Folder Hotlist button can also be triggered by ⌘ Command + D on your keyboard.
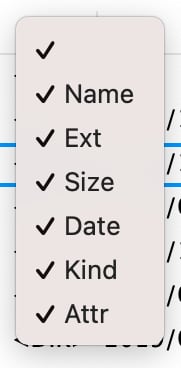
Below you'll find the file list Columns Headers. You can drag the vertical lines to resize columns. You can drag the column names to reorder them. You can right-click to see a menu that allows you to toggle visibility of columns.

Below the file list columns you'll find the actual file list, showing the current folder's contents. The first item (..) is always a link to the parent folder.
Below the file list you'll find the Status Bar, which shows the number of selected file and folders, the total number of files and folders and their sizes.
See the Navigation page for more information on how to use the file list.
Left Sidebar

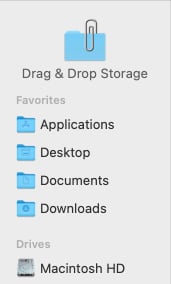
At the top of the left sidebar you'll find the Drag & Drop Storage box. You can drag files here to temporarily store their link until you navigate to a different folder path, then you can drag the files from the Drag &Drop Storage box to the new destination.
Next you will find the Favorites section. When starting DCommander for the first time, it will automatically import your favorite locations from Finder. You can drag/drop folders and drives here for quick access. You can also change their position by dragging them up or down. To delete a favorite item, drag it outside the Favorites section.
Below you will find the Drives section. It shows all the connected (mounted) drives on your Mac for quick access. Right click on a drive to Open, Unmount or to Scan for New Drives.
Right Sidebar

The right sidebar has two modes of display: Favorite Shortcuts (such as on the left sidebar) or File Information. Use the toolbar button to toggle between modes.
The File Information mode shows detailed information about the currently selected item in the active file list.
Each information field can be selected, allowing you to copy the text to clipboard. This is useful for copying the full path or extended attributes to clipboard.
The Preview section shows a quick visualization of the currently selected item's contents.