DSync 2
Easy Synchronization
- by: DevStorm Apps
- email: contact@devstorm-apps.com
If you need any help, we're only an email away.
Initial Setup
Launch DSync and you’ll be greeted with this screen:
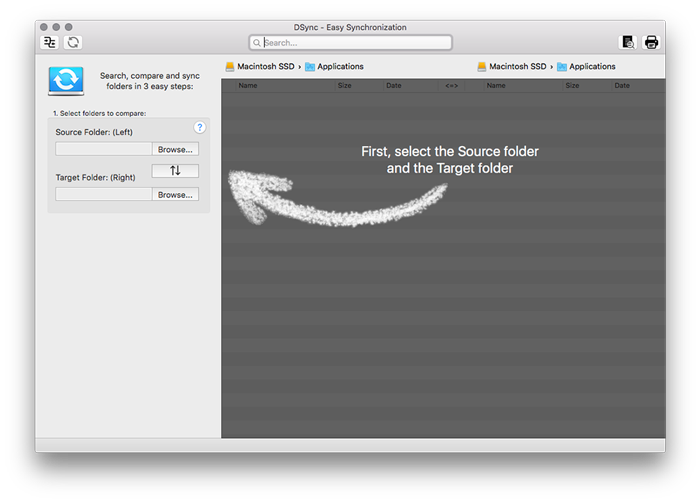
It tells you to select a Source folder and a Target folder.
– The Source folder is the location where the items you want to synchronize are located, for example your active project’s folder.
– The Target folder is the location where you want to synchronize the items to, for example a backup folder of your project.
Go ahead and select a Source folder and a Target folder. Once you’ve chosen them, the on-screen tutorial will change to this:
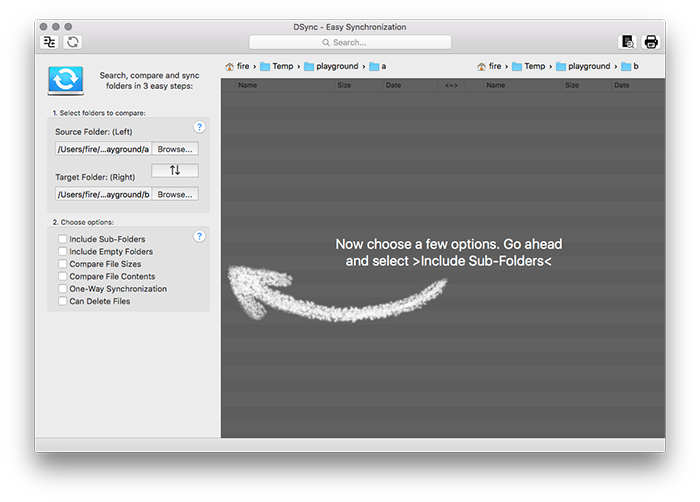
A new panel appears, allowing you to select multiple options on how to compare and synchronize the two folders.
– Include Sub-Folders means that every folder will be scanned for other folders included in it’s contents.
– Include Empty Folders means the compare and synchronization will include empty folders as well, instead of ignoring them
– Compare File Sizes means the compare procedure will look at a file’s name as well as size when comparing
– Compare File Contents means the compare procedure will look at a file’s name as well as contents when comparing
– One-Way Synchronization (also called Asymmetric) means the no files will be copied from the Target folder to the Source folder
– Can Delete Files means the synchronization procedure is authorized to delete files
For now, we’ll just choose Include Sub-Folders. The onscreen tutorial will now show:
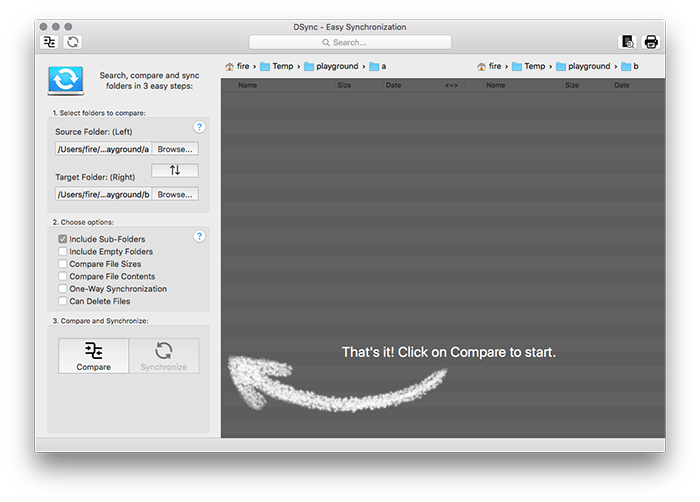
That’s it! You can now click on Compare, which will start the compare procedure.
Filtering Compare Results
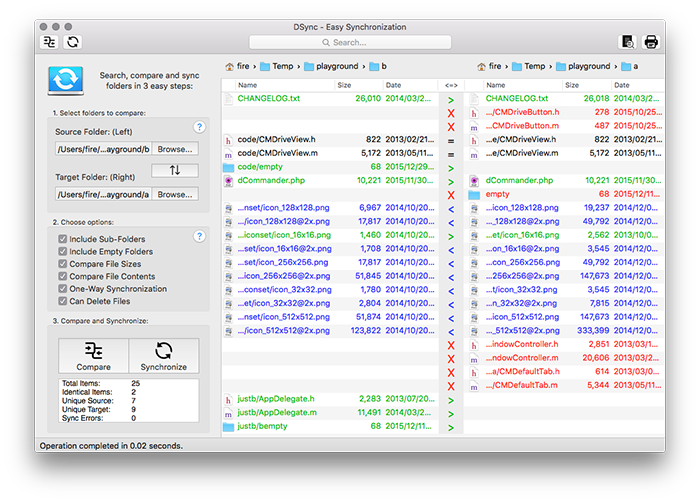
The compare procedure has ended and it gave the following results:
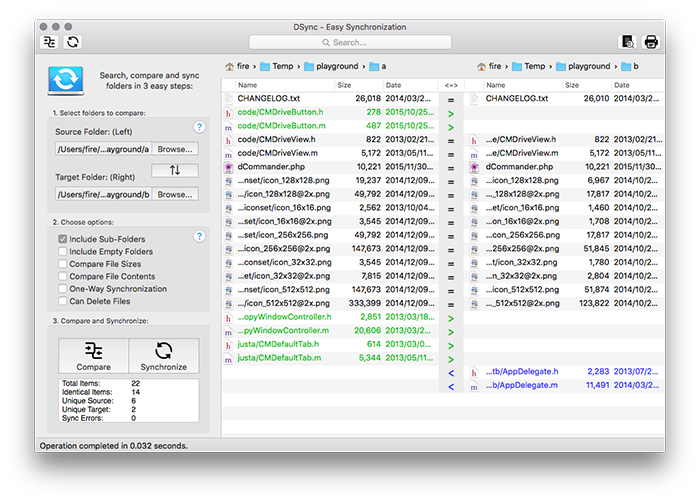
That’s great, it gives us a clear understanding of both the source and target folders. But on close inspection we notice that all the png icon files are marked as equal, despite their file size being different. This is because with the initial configuration, DSync ignores file sizes.
To fix this, enable Compare File Sizes and click on Compare again.
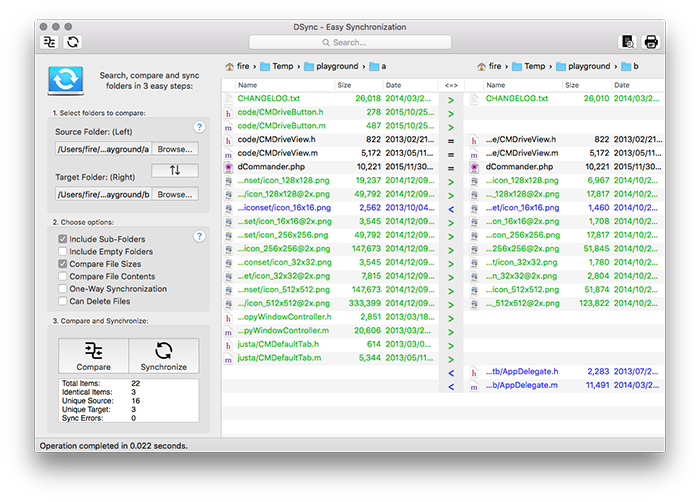
As you can see, DSync now knows the png icon files from the source folder and different from the ones in the target folder. In most cases, comparing file size will be sufficient. However, you might want to analyze the file contents as well, in case the file size match on both source and target locations. An example of this is the ‘dCommander.php’ file, which has the same 10,221byte size in both locations.
To fix this, enable Compare File Contents and click on Compare again.
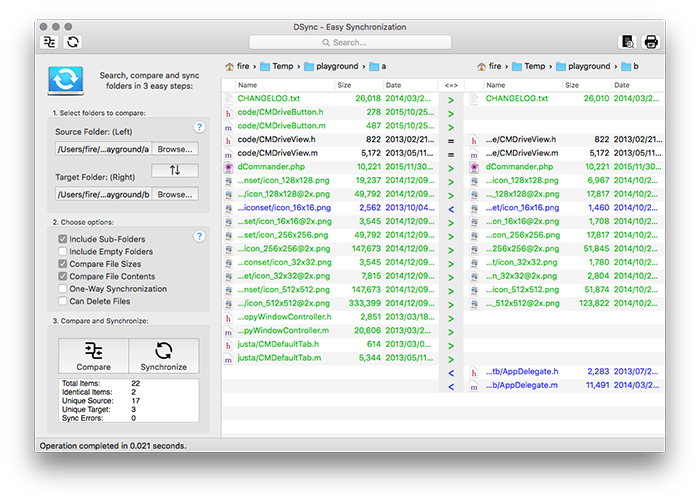
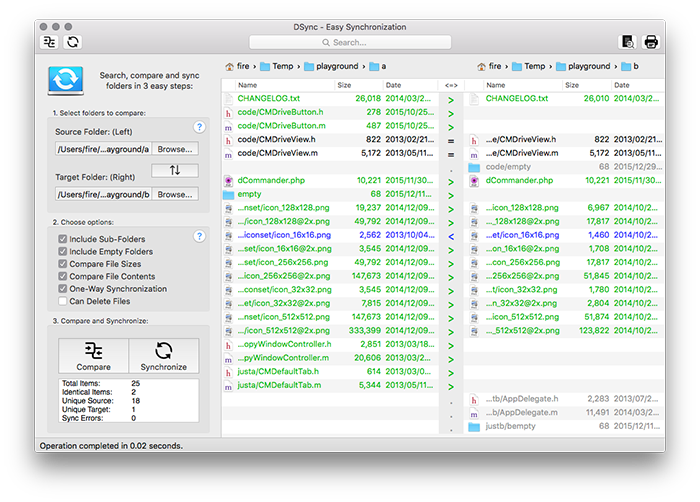
So far so good, DSync knows the dCommander.php file from the source folder is different. But there is still something missing, namely the empty folders. In this example we want to synchronize empty folders as well.
To fix this, enable Include Empty Folders and click on Compare again.
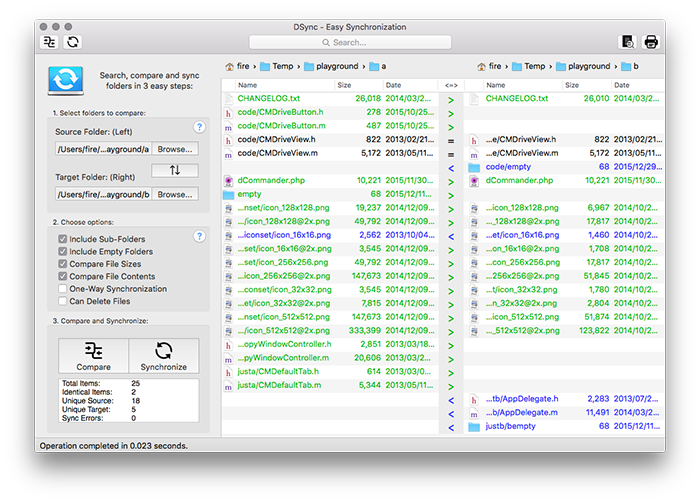
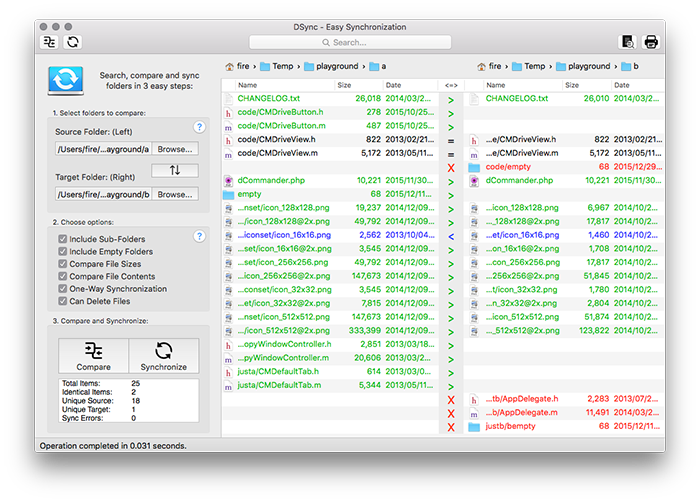
Much better. You could click on Synchronize now to perform this basic synchronization between these two folders, but we’ll study a more advanced technique.
Advanced Filtering
We want to perform a One-Way Synchronization, meaning that we want all the files from the Source folder to be copied to the Target folder, but no files should be copied from the Target folder to the Source folder.
To do this, enable One-Way Synchronization and click on Compare again.
Despite the One-Way Synchronization, we want to keep the icon_16x16.png file from the Target folder. So we select the icon_16x16.png file and press T on the keyboard (or right-click and then Toggle). Once this is done, you should see something like this:
Notice the greyed out items? That means they will be ignored. This is great in case we want our synchronization to be non-destructive. But in this example we want to delete files from the target folder that we don’t longer need.
To do this, enable Can Delete Files and click on Compare again.
The red files will be deleted when clicking Synchronize.
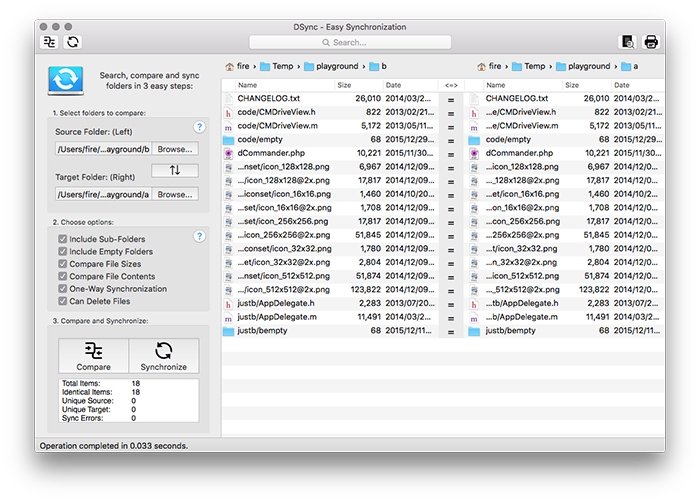
Now let’s stir things up a bit and swap the Source and Target folders. Just click on the Swap button (between the two Browse… buttons) then click Compare. We’ll also modify the copy direction of various files to match our needs so that we end up with something like this:
This is basically what we need. It looks so good that we can print it. Just click on the Print button if you want.

Finally, you can click on Synchronize and you’ll see the results:
All files and folders are equal, exactly as we wanted them to be.
More Options
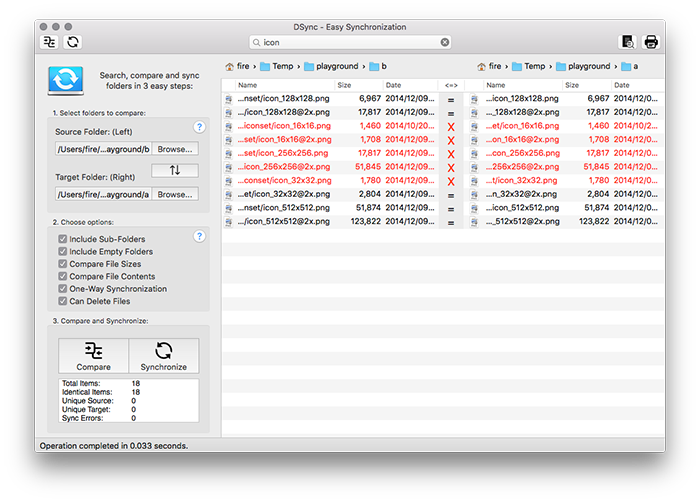
Don’t forget that you can always search results and modify them directly for the next synchronization procedure. In this case we want to search and delete some of the png icon images:
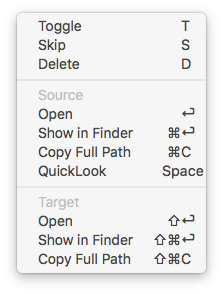
You also have a right-click menu for every result, allowing you to toggle the copy direction, skip or delete it. There is also a possibility to preview each result in QuickLook, Finder or copy it’s path to clipboard.
F.A.Q.
Can I use the trial after 7 days?
The trial will stop working after 7 days, you'll need to purchase a license to continue using DSync. You can purchase a license here.
How many activations does a license have?
You can activate it 3 times.
How much do DSync updates cost?
Minor updates, such as 2.x are FREE for existing customers. Major updates such as 3.0 have a 50% discount for existing customers.
Why do major updates cost money?
We want to provide the best possible experience for everyone. In order to add new features and offer great support we need to finance our team.
Will my version of DSync stop working after a newer version is released?
Not at all. You can continue to use your version of DSync as much as you want, but support for it will eventually stop.
I have more questions not answered here...
You can always Contact Us and we'll gladly help you!